This particular set of steps is done using a freshly-installed version of 64-bit Windows 8.1. The concepts are largely stolen from here, but I removed anything about really old versions of Windows.
Install Emacs
1. Download Emacs for Windows from the Big Page. As of this writing (Oct 19, 2013), the current version is 24.3. Yes, this is “precompiled”. Why would I want anything else? Yes I know, yada yada. I’m more about the gratis than the libre.
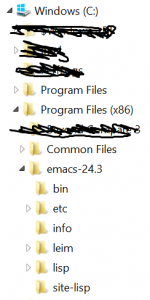
2. Unzip it someplace and just keep the inner directory emacs-24.3. In keeping with other Windows programs, you should put it in C:\Program Files (x86)\. I’m guessing there is probably some risk in having spaces and stuff in the directory name. I wouldn’t be surprised if Emacs had a problem with this under some condition, but it seems to work for me. So now your directory tree looks like this, minus the scribbles.
3. At this point you’re supposed to select a “home” where Emacs stores its config information, elisp code that gets downloaded, etc. My recommendation is to leave your HOME variable undefined. Normally this would involve setting the HOME environment variable to some directory, but in the absence of this, Emacs picks other locations based on what version of Windows you’re running. It’s convoluted, so read here. If you have some other program that defines a HOME variable (such as any of the Unix-based tools running on Windows), you are fucked. Emacs will pick this location first because it exists and you will be stuck putting your .emacs (or init.el or whatever) file in that location. I have not found a way to force Emacs to pick another location since HOME is the first place it checks.
Quick tip: In Emacs terminology CTRL-x or C-x means press the CTRL key and x at the same time. The - is a dash not a minus, and the instruction would be the same if there were a + as in normal computer text instructions, ie CTRL+x; however using the dash is typical for Emacs instructions so I’ll use it here. If there is no dash in the instruction, then press the keys in sequence. So CTRL-x k means press CTRL-x first, then press k. In this case, this is the sequence to “kill” the buffer, ie close the file. In this case, Emacs will prompt you at the bottom of the screen to check if you want to save any unsaved changes.
Quick tip: Don’t try using the menus and expect to find anything useful. It’s the most convoluted piece of junk ever created. I’ve only ever been able to open/close a file, save-as, and change fonts from there, and sometimes get a keystroke reminder for compiling stuff from the source buffer. Everything else is complete nonsense if you are trying to use the menu to do normal editor stuff, or explore what’s out there. Google is your friend for discovering Emacs.
Quick tip: if you are stuck in some Emacs state/mode and you can’t get out of it, press CTRL-G a bunch of times. This is like pressing ESC in most modern applications, in that it will get you out of whatever thing you’re in and take you back to normal mode. Pressing ESC usually works too, but this is an after-thought in Emacs history. In Emacs terminology you will see “Meta-x” or M-x a lot. This is historic, based on an ancient keyboard that had a “meta” key, and is completely irrelevant in this day and age. This means “press ESC then press x“, or equivalently it can mean ALT-x, which is preferred. So if you accidentally press ESC then some other key, you are inadvertently doing the same thing as pressing ALT-<that other key>. So just press CTRL-G to quit out of whatever state you’re stuck in.
Quick tip: ALT-x is different from most of the other C-<whatever> key sequences. ALT-x puts you in the little command buffer at the bottom of the screen. From here you can tell Emacs to do stuff, such as start nrepl so you can live a live Clojure session from the editor (nrepl-jack-in), change how the line wrap works (toggle-truncate-lines), turn on paredit (paredit-mode), etc. While in this state, you can use the normal Emacs cursor keys (C-f, C-b, C-e, C-k) and recall previous commands (ALT-p). You can quit/cancel the current command from here as described above, with C-g, or just complete the command with Enter.
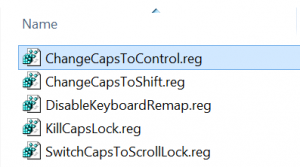
Quick tip: You will be using the CTRL key a lot. Best to remap your useless caps-lock key to be an additional CTRL key. Here is the page. Here is the zip file. Open up the zip file and double click on ChangeCapsToControl.reg. This probably needs a reboot to kick in. Now your pinkie won’t be extra muscular by trying to reach down to the lower left all the time.
Quick tip: You can use the normal arrow keys, backspace, delete, mouse, etc., to edit in Emacs. This was not always the case, but it’s pretty standard nowadays for modern users. I tried once setting Emacs to use CUA keystrokes (common user accessibility), but this screws things up as all the other commands have to get rearranged; I don’t recommend this. Just train your brain. It doesn’t take long, and once you’re used to moving the cursor around and deleting stuff, compiling, changing buffers, windows, etc., without moving your hands, you’ll be annoyed at other editors for not having this functionality. I have also switched to Dvorak layout and I find it extremely comfortable and easy to use; you may wish to do the same, although the Emacs keys become a little weirder in terms of the neuromuscular distortions you need to encode in your mind. Now go out and try to make friends by telling them you write Clojure using Emacs with a Dvorak keyboard. Observe the funny looks you get. The requisite xkcd links are here and here.
4. You can find which location emacs wants to use as its home by starting up emacs directly ("C:\Program Files (x86)\emacs-24.3\bin\runemacs.exe") and then typing CTRL-x d ~\ The CTRL-x d tells Emacs to open a directory. The ~\ resets the search path back to what it thinks is the home directory. Forward slash or backward slash doesn’t matter. (Honestly I’m not sure what the differences are among runemacs.exe, emacs.exe, emacsw.exe, etc. My fingers like to type emacs at the command line since that’s what I learned in college 100 years ago on Unix machines, but evidently on a Windows machine you’re supposed to use emacsw.exe or runemacs.exe. Sometimes a client/server thing pops up too.) At the bottom of the Emacs window you should see this:

Press Enter and you get something like this. Yes I’m doing this as Admin, but do as I say and not as I do, and run all this stuff from a normal user account.
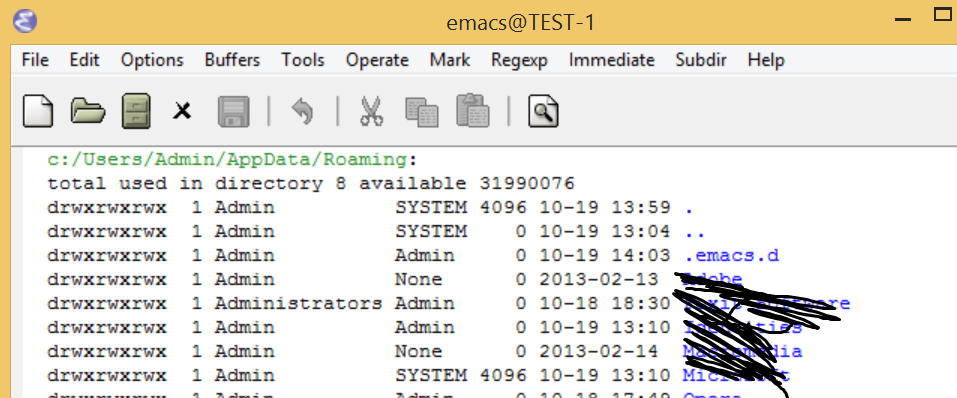
So in this case Emacs is using the c:/users/Admin/AppData/Roaming directory as the home directory. This is just FYI; we won’t be using this view now. Since this is a new install, you don’t have an init file yet.
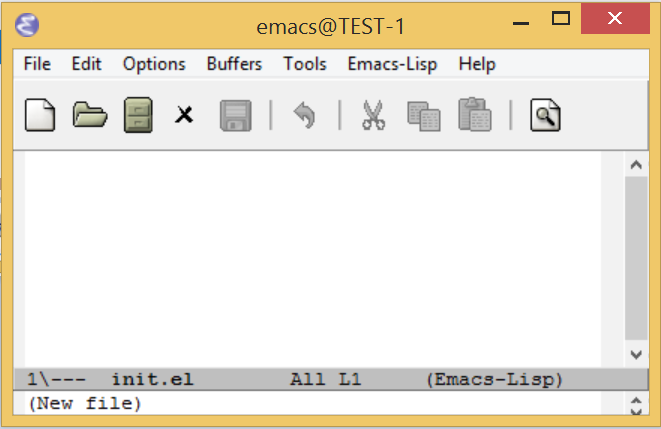
5. Create a new init file in this home directory. Traditionally this is called .emacs, but it can also be called .emacs.d/init.el, or other variants. So type CTRL-x CTRL-f ~/.emacs.d/init.el, and you should see the following at the bottom of the screen.

Press enter and you get the new blank file in the editing “buffer”.
Type C-x C-s to save the (blank) file. You don’t actually need to release the CTRL key. Verify its existence with C-x d Enter. The correct directory should automatically populate in the little command line area. If not, add ~/ before pressing enter.
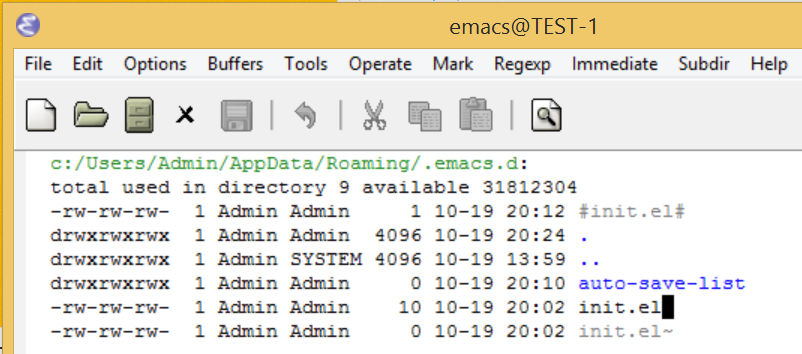
Emacs junks up your directory with #init.el# and init.el~ . These are backups. 5. Add the following to your init.el file, then restart Emacs or type ALT-x eval-buffer (From the gitub site)
(require 'package)
 (add-to-list 'package-archives
 '("marmalade" . "http://marmalade-repo.org/packages/"))
 (package-initialize)
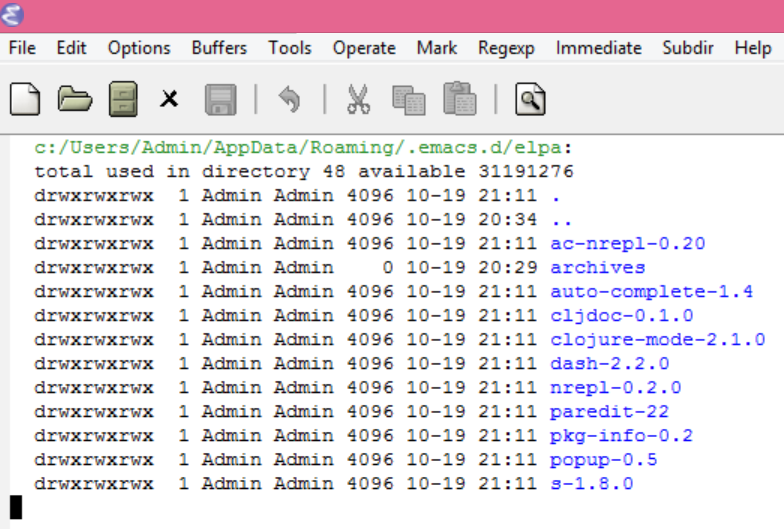
5. Start downloading stuff for Clojure mode support. Type ALT-x package-list-packages For long commands like this you can press TAB in the middle and it’ll complete, or show you a list of possible completions in the little command line area. You get a list of packages to download. Use the arrow keys and i to select packages for install, then x to install them. You can search for a packages with CTRL-s <package name>, then CTRL-s repeatedly to search again. Select the following: clojure-mode, cljdoc, ac-nrepl, nrepl, paredit. After downloading, you can see these packages in the ~/.emacs.d/elpa directory. Elpa is the emacs library system. I really don’t know anything more than that.
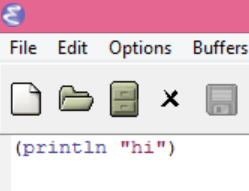
6. At this point emacs will do syntax highlighting on clojure files and probably other stuff based on the above stuff you downloaded. Create a file called junk.clj by typing C-f c:\users\Admin\code\junk.clj (it will give you instructions on creating the code directory) and put in the following:
(println "hi")
This should result in coloring like this:
Install Java
6. Download and install the JDK and add the bin directory to your path. As of this writing the JDK version is 7u45. Actually the installation by itself adds java.exe and some other executables to your Windows/System32 directory, so strictly speaking I don’t think you need to change your path. However at some point you’ll want javac.exe and other developer stuff which is not in Windows/System32, so best to just get it over with. I’m guessing that Lein and some of the Emacs support for Clojure will also want a real home location for Java.
On an unadulterated Windows 8 machine, changing the path is done through the search in the main tile page. Press the Windows key  to bring up the start page (or
 CTRL+ESC), then just start typing “environment” and the selection will pop up, then select it. In reality I skip this altogether as I have installed StartIsBack which returns sanity back to the Windows 8 user experience. Make sure to select “Edit the system environmentvariables” not “Edit environment variables for your account”.

Click Environment Variables, then double click path in System Variables, and edit in the box:
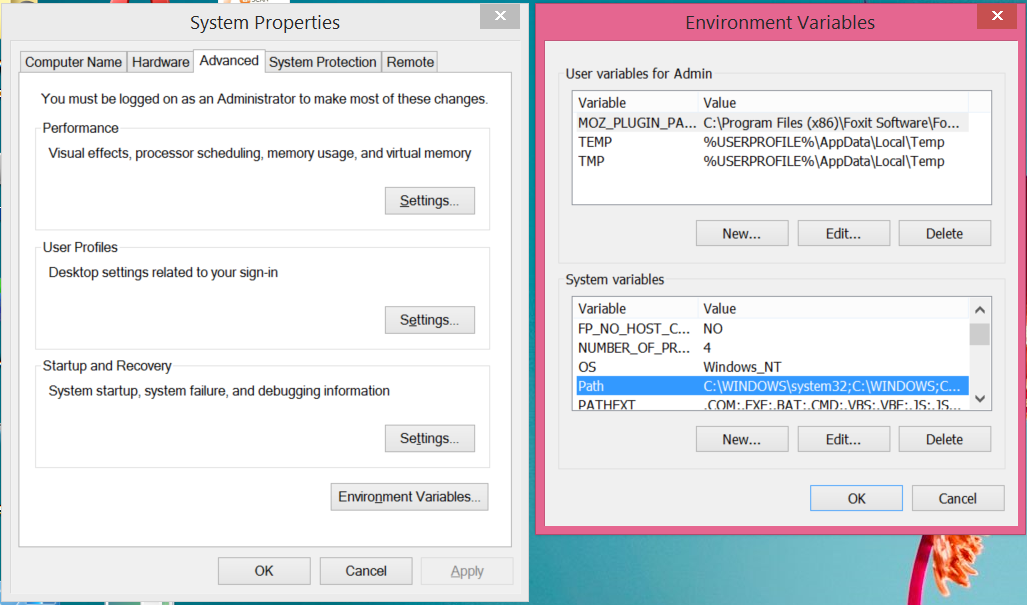
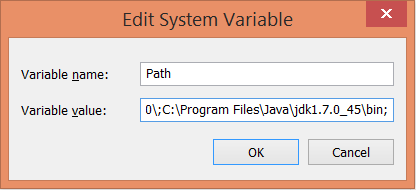
You’ll probably also want to set up JAVA_HOME, which is done in a similar manner.

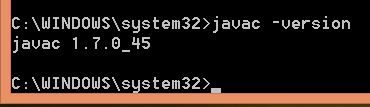
Verify the new Java installation works:
Install Lein
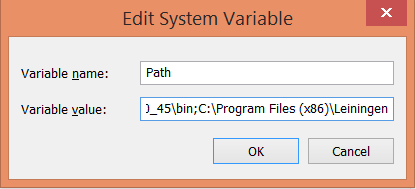
7. Install Lein by downloading lein.bat and placing it in c:\Program Files (x86)\Leiningen, and adding this location to your path.
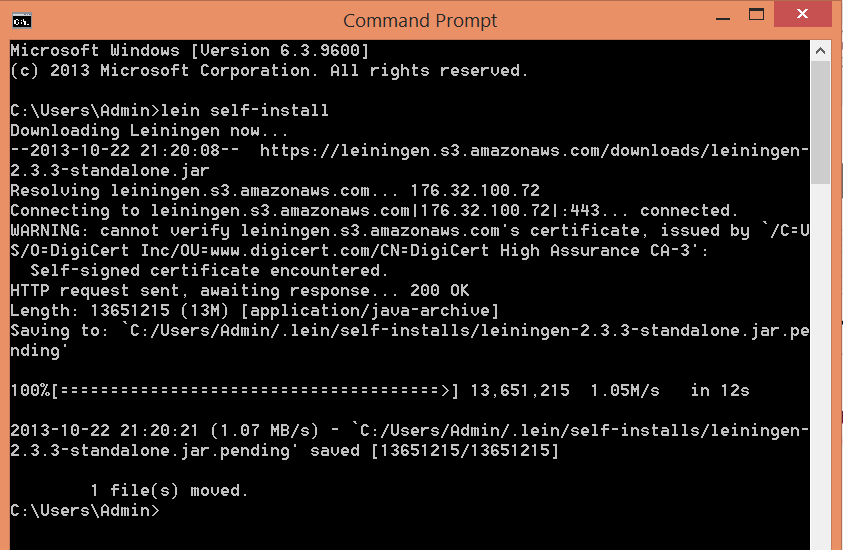
Then open up a command prompt and run lein self-install.
8. Create a new project with Lein. Change to your code directory and create a Clojure project with lein new temp_project. 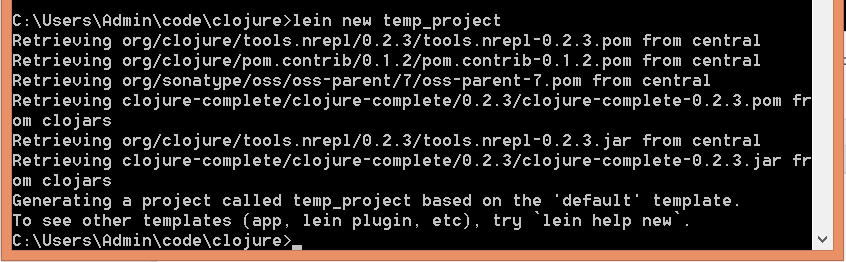
9. Update the project so it knows the namespace. Change to the project directory and open the project.clj file. Be sure to use tab completion so it doesn’t hurt your brain. You can of course just start up emacs with the mouse and open the file that way (C-x C-f c:\users\admin\code\clojure\temp_project\project.clj). And of course I’d recommend putting the emacs bin directory in your path so you can call it up immediately from the command line.


Add a single line to the bottom of project.clj, then C-x C-s to save it. Notice there is a dash, not an underscore, in the namespace. This matches the namespace in the source file.
(defproject temp_project "0.1.0-SNAPSHOT"
 :description "FIXME: write description"
 :url "http://example.com/FIXME"
 :license {:name "Eclipse Public License"
 :url "http://www.eclipse.org/legal/epl-v10.html"}
 :dependencies [[org.clojure/clojure "1.5.1"]]
 :main temp-project.core)
10. Update the source file so it has a -main function. Open up the test file left by Lein: C-x C-f src/temp_project/core.clj

Add the following highlighted function definition, then C-x C-s to save.
(ns temp-project.core)
(defn foo
 "I don't do a whole lot."
 [x]
 (println x "Hello, World!"))

(defn -main []
 (foo 3.14159))
11. Run the program from the command line. Change to the project directory (doesn’t matter how deep in the directory tree) and say lein run.

Use Emacs to run Clojure
12. Now that Lein works, open up the source file again in Emacs. C-x C-f c:/Users/Admin/code/clojure/temp_project/src/temp_project/core.clj
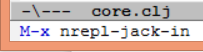
13. Start up nrepl with ALT-x nrepl-jack-in (again use tab-completion). Remember the M-x shown below is Emacs’ interpretation of ALT-x for modern users.
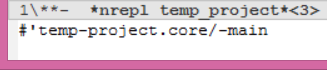
This will open up a new window with the REPL.

14. Compile the source code. Change window focus back to the source code by clicking in the source window (or press C-x o) so the bottom of the source window is dark gray, then compile everything with C-c C-k. This gives you something like this. Press y.

Then you get something like
15. Press C-c C-z to jump back to the REPL (you could also do C-x o. The former takes you to the REPL from any window; the latter only jumps to the “next” window, which works when you only have 2 windows open). Your program is now “in” the REPL, ie the functions have been compiled and are ready to run, except they’re stored in the temp-project.core namespace.
16. Change to the correct namespace with (in-ns 'temp-project.core). You can use tab completion with this too. Then run the main function with (-main):
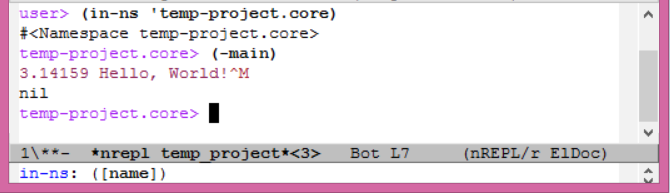
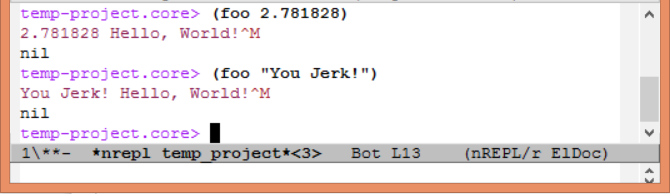
17. You can of course run the other function too, with (foo 2.781828) or (foo "You Jerk!").
Congratulations!
You have just completed what took me a few weeks of hard labor to figure out. I obviously didn’t invent this stuff, but I haven’t really seen a direct step by step procedure yet on how to do this; I’ve only found little bits and pieces around the web. There is a ton more to do. Specifically, I haven’t set up the Emacs init.el file. This is almost like getting a PhD in itself. Since I recently wiped my computer without saving the file, I have to create it again from scratch, so that will take some time. But in general, I like to enable all the fancy editing features for lisp, specifically paredit mode, enabling the auto documentation for both the editor window and the REPL, changing front and color size, getting rid of the stupid splash screen that comes up, and some other stuff I came across which actually involved some elisp in the init.el file. Kind of annoying, but it makes the overall usage a little better.
In a future post I will show a simple JavaFX app.